

How To Activate Team Takeover 2k23
Hither is the NBA 2K23 Badges & Takeover Guide, Analysis, and Requirements, which lists all badges, badge tier lists, badge requirements for both current and next-gen, takeovers, takeover perks, how to unlock badges, as well as a breakup of tips, info, and more when you lot click on each individual badge.
Also See:
- NBA 2K23 Best Builds
- NBA 2K23 Core Bluecoat Patterns Explained
- NBA 2K23 All-time Badges for All Builds
- NBA 2K23 How to Go Badges Fast
- NBA 2K23 Animations Requirements (All)
How to Unlock Badges
- Badges are organized by the skill categories of Finishing, Shooting, Playmaking, and Defense/Rebounding.
- Badges are unlocked by accumulating plenty points in each skill skill category that turn into Badge Points. Earned Bluecoat Points tin be spent on badges per skill category.
- New Tiered Badges Organisation. In that location are 16 badges per attribute category: eight in Tier 1, iv in Tier two, and four in Tier 3. Tier 1 badges are the least powerful for your thespian, but also toll the least amount of bluecoat points.
- Costs go upwards as you climb the tiers and learn the more impactful badges. The basic idea is that you'll demand to equip a certain number of badges in the lower tiers before y'all can equip badges in the highest.
- New "Cadre" badges, which are four unique badge slots (one in each attribute category) that tin be filled with badges that don't count toward your bluecoat points.
- Each core badge will have a claiming requirement that, once met, will allow the bluecoat to exist placed into a core bluecoat slot.
NBA 2K23 Badge Points (Next-Gen)
| Name | TIER 1 | TIER 2 | TIER 3 |
| Statuary | 1 | 3 | 5 |
| SILVER | 2 | 4 | 6 |
| GOLD | 3 | five | 7 |
| HOF | 4 | six | 8 |
Click on any of the individual badges to get the full NBA 2K23 Badges breakup and analysis! This includes a list of best builds for each badge, badge tips, badge info, and more.
NBA 2K23 Badges Guide & Requirements
1. Finishing Badges
two. Shooting Badges
iii. Playmaking Badges
iv. Defence force / Rebounding Badges
5. Badge Points & Req. (Concluding-Gen)
6. Takeover Guide
7. Takeover Perks
Finishing Badges
| Badge | Description | Aspect | B | Southward | G | H | Min Height | Min Height |
|---|---|---|---|---|---|---|---|---|
| Acrobat | Hop step, euro-stride, cradle, contrary, and change shot layup attempts receive a boost. Additionally, the ability to beat defenders with gathers is improved | Driving Layup | 65 | 76 | 84 | 94 | 5'7" | 7'0" |
| Aerial Wizard * | Increases the ability to finish an alley-oop from a teammate, or putback a end off an offensive rebound | Driving Dunk | fifty | 66 | 81 | 92 | ||
| Standing Dunk | fifty | 67 | 82 | 93 | ||||
| Backdown Punisher | Permit players to have more success than normal when backing down a defender in the paint while posting up | Post Control | 55 | 72 | fourscore | 87 | ||
| Strength | 65 | 76 | 86 | 94 | ||||
| Bully * | Improves a player'southward ability to initiate contact and become to the rim on layups attempts | Forcefulness | 74 | 82 | 89 | 95 | six'2" | seven'3" |
| Dream Milk shake | Post move fakes have a higher chance of stunning a defender. As well, shot attempts following post fakes, shimmies, and shot fakes have an increased shot percentage | Post Control | 45 | 62 | 77 | 86 | ||
| Dropstepper | Allows for more success when attempting mail dropsteps and hop steps, in improver to protecting the ball better, while performing these moves in the mail | Mail Control | 58 | 69 | 78 | 87 | ||
| Fast Twitch | Speeds upward the ability to become standing layups or dunks off before the defense force has time to contest | Close Shot | 67 | 75 | 85 | 96 | ||
| Continuing Douse | lxx | 87 | 94 | 99 | ||||
| Fearless Finisher | Strengthens a player's ability to blot contact and nevertheless finish. Also reduces the amount of energy lost from contact layups | Close Shot | 65 | 75 | 84 | 93 | ||
| Driving Layup | 67 | 77 | 87 | 96 | ||||
| Giant Slayer | Boosts the shot percent for a layup attempt when mismatched against a taller defender and reduces the possibility of getting blocked | Close Shot | 48 | 57 | 68 | 77 | 5'7" | 7'0" |
| Driving Layup | 55 | 63 | 70 | 80 | ||||
| Limitless Takeoff | When attacking the basket, a player with this bluecoat will start their dunk try from father out than others | Driving Dunk | 65 | 79 | 86 | 96 | ||
| Masher * | Improves a player'southward power to stop well around the rim, especially over smaller defenders | Close Shot | 63 | 73 | 82 | 95 | ||
| Post Spin Technician | Attempting to do post spins or drives results in more effective moves, and less of a hazard to be stripped | Postal service Control | 46 | 57 | 70 | 80 | ||
| Posterizer | Increases the chances of throwing down a dunk on your defender | Driving Dunk | 72 | 85 | 93 | 99 | ||
| Pro Bear upon | Gives an extra shot boost for having slight early, slightly late, or fantabulous shot timing on layups. Layup timing must exist turned on | Close Shot | 49 | 55 | 69 | fourscore | ||
| Driving Layup | 45 | 55 | 67 | 78 | ||||
| Rise Upward | Increases the likelihood of dunking or posterizing your opponent when continuing in the painted area | Standing Dunk | 67 | 80 | 90 | 98 | 6'iv" | seven'iii" |
| Slithery * | Increases a player's ability to slide through traffic, protect the brawl from beingness stolen, and avoid contact during gathers and finishes at the rim | Driving Layup | 69 | 79 | 89 | 99 | ||
| Driving Douse | seventy | 84 | 92 | 98 |
Shooting Badges
| Badge | Description | Aspect | B | South | Yard | H |
|---|---|---|---|---|---|---|
| Amanuensis three * | Improves the ability to make pull-up or spin shots from three point range | Three Point Shot | 68 | 83 | 89 | 96 |
| Amped * | Reduces the penalisation that fatigue has on a player and their power to make shots | Mid-Range Shot | 59 | 70 | 78 | 85 |
| Iii Signal Shot | 70 | 75 | 82 | xc | ||
| Blinders | Leap shots taken with a defender closing out in their peripheral vision will suffer a lower punishment | Mid-Range Shot | 65 | 77 | 84 | 94 |
| Three Indicate Shot | lxx | 80 | 89 | 97 | ||
| Grab and Shoot | For a short time after receiving a pass, the receiver's outside shooting attributes get a significant boost | Three Point Shot | 60 | 72 | 81 | 93 |
| Claymore * | Increases the power to knock down perimeter shots when spotting upwardly patiently | Three Betoken Shot | 55 | 69 | 76 | 86 |
| Clutch Shooter | Shot attempts that occur during the final moments of the quaternary quarter, or in any overtime period, receive a large boost | Mid Range Shot | 49 | 59 | 69 | 79 |
| Iii Point Shot | 49 | 59 | 69 | 79 | ||
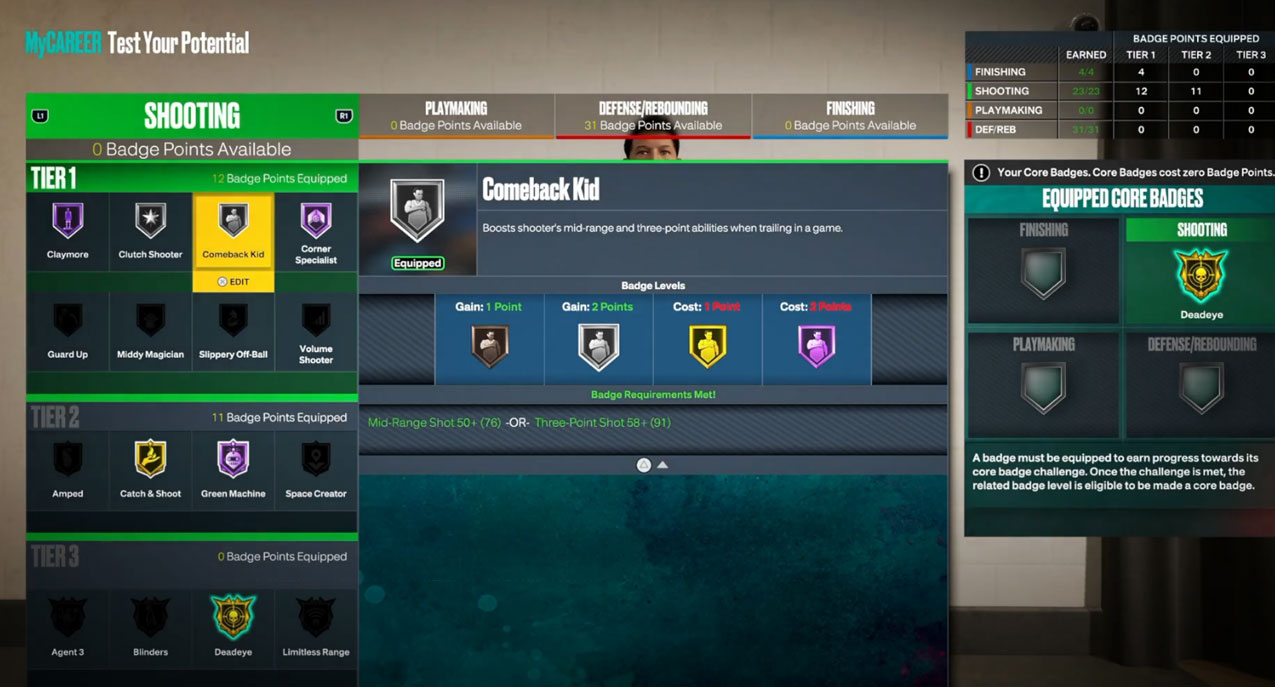
| Comeback Kid * | Boosts shooter's mid-range and three-point abilities when abaft in a game | Mid Range Shot | forty | fifty | lx | 70 |
| Three Bespeak Shot | 48 | 58 | 68 | 78 | ||
| Corner Specialist | Deep range shots taken along the baseline of the court receive a boost, whether it is off the distill or off a grab | Iii Point Shot | 60 | 69 | 79 | 89 |
| Deadeye | Jump shots taken with a defender closing out receive less of a penalty from a shot contest | 3 Bespeak Shot | 71 | 82 | 91 | 99 |
| Dark-green Machine | Gives an additional shot boost when consecutively achieving first-class releases on jump shots | Mid Range Shot | lx | 71 | 80 | 90 |
| Three Point Shot | 60 | 73 | 82 | 82 91 | ||
| Guard Up * | Increases the power to brand jump shots when defenders neglect to properly competition | Mid Range Shot | 55 | 69 | 77 | 8660 |
| Three Point Shot | 60 | 73 | 83 | 90 | ||
| Limitless Range * | Extends the range from which a histrion can shoot 3-pointers effectively from deep | Three Point Shot | 74 | 85 | 92 | 99 |
| Middy Wizard | Boosts the effectiveness of pullups, spin shots, and fadeaways from the mid-range area | Mid Range Shot | 50 | 64 | 73 | 81 |
| Slippery Off-Ball | When attempting to get open off screens, the player more finer navigates through traffic | Mid Range Shot | forty | l | 60 | seventy |
| Three Bespeak Shot | 40 | l | 60 | 70 | ||
| Space Creator | Increases a player's to both hit shots after creating infinite from the defender, also as cross upward an opponent on step-back moves | Mid Range Shot | 52 | 64 | 73 | fourscore |
| 3 Point Shot | 53 | 65 | 74 | 83 | ||
| Volume Shooter | After a player has taken a small handful of shots, an additional boost to shot attributes is given for every subsequent shot, whether information technology'south a make or a miss | Mid Range Shot | 45 | 59 | 68 | 78 |
| Three Point Shot | 50 | 64 | 73 | 80 |
Playmaking Badges
| Bluecoat | Description | Attribute | B | S | Thou | H | Min Elevation | Max Height |
|---|---|---|---|---|---|---|---|---|
| Ankle Breaker | When performing stepbacks and other certain moves, the defender stumbles or falls more frequently when biting the wrong way | Ball Handle | 55 | 65 | 71 | 81 | 5'7" | 6'9" |
| Bail Out | Passing out of a leap shot or layup yields fewer errant passes than normal. Additionally, helps passing out of double teams | Pass Accuracy | 65 | 78 | 85 | 94 | ||
| Break Starter | After grabbing a defensive board, deep outlet passes made up the courtroom are more accurate. Passes must be made chop-chop post-obit the defensive rebound | Pass Accurateness | 55 | 65 | 76 | 86 | ||
| Clamp Breaker * | Improves a thespian's ability to fight off contact, protect the ball, and drive by opponents as the ball-handler | Brawl Handle | 64 | 77 | 87 | 96 | ||
| Dimer | When in the one-half-court, passes past Dimers to open up shooters yield a shot per centum boost | Pass Accuracy | 64 | 69 | 80 | 85 | ||
| Flooring General | Teammates receive an offensive attribute bonus when actor is in the game | Laissez passer Accuracy | 62 | 69 | 79 | 86 | ||
| Handles For Days | A role player takes less of an energy hit when performing sequent dribble moves, allowing them to chain together combos quicker and for longer periods of fourth dimension | Ball Handle | 70 | 85 | 94 | 99 | 5'7" | 7'0 |
| Hyperdrive | Increases the speed at which a actor tin perform moving dribble moves as the set on down the court | Ball Handle | 59 | 69 | 83 | 92 | 5'7" | half-dozen'10 |
| Speed With Ball | 55 | 67 | 80 | xc | 5'7" | 6'x | ||
| Killer Combos * | Improves a player'due south ability to concatenation together efficient dribble moves when sizing up their opponent | Ball Handle | 65 | 78 | 88 | 97 | 5'7" | half dozen'x |
| Mismatch Expert * | Improves the players ability to shell taller defenders off the dribble in one-on-1 situations when they're switched onto them | Brawl Handle | 71 | 86 | 93 | 98 | ||
| Needle Threader | When passing through a tight window betwixt defenders, a heave is given to the player's passing power | Laissez passer Accuracy | 65 | lxx | 86 | 92 | ||
| Post Playmaker | When passing our of the mail service or afterwards an offensive rebound, receivers are given a shot heave | Pass Accurateness | 45 | 59 | 73 | 83 | ||
| Quick Start Step | When driving out of a triple threat or after a size-up, ball handlers have admission to quicker, and more effective, launches | Post Command | eighty | 87 | 94 | 99 | ||
| Ball Handle | 70 | 77 | 85 | 89 | ||||
| Speed With Ball | 66 | 76 | 84 | 88 | ||||
| Special Delivery | Increases alley-oop throw success and shot take chances for receivers afterwards a flashy pass. Additionally, it enables the ability to throw alley-oops off the backboard | Laissez passer Accuracy | 47 | 57 | 67 | 77 | ||
| Unpluckable | Defenders accept a tougher time poking the ball gratis with their steal attempts | Post Command | 65 | 75 | 84 | 95 | ||
| Ball Handle | 65 | 75 | 84 | 95 | ||||
| Vice Grip * | Increases a player'southward ability to secure the ball confronting steal attempts after obtaining possession from a rebound, take hold of, or loose ball | Postal service Control | 45 | 57 | 77 | 91 | ||
| Ball Handle | 50 | threescore | 75 | 90 |
Defense / Rebounding Badges
| Badge | Description | Aspect | B | S | G | H | Min Height | Max Height |
|---|---|---|---|---|---|---|---|---|
| Ballast * | Increases a player's power to cake shots and protect the rim at a high level | Cake | 70 | 87 | 93 | 99 | vi'4" | 7'3" |
| Ankle Braces | Lowers the likelihood of getting ankle-broken by opposing dribble moves | Perimeter Defense | 55 | 67 | 76 | 86 | five'7" | 6'11" |
| Boxout Beast * | Helps rebounders win boxout battles on both offense and defensive rebounding situations | Offensive Rebound | 48 | 67 | 82 | 94 | ||
| Defensive Rebound | 48 | 67 | 82 | 94 | ||||
| Strength | 60 | 70 | 83 | 91 | ||||
| Brick Wall | Increases the effectiveness of screens, is tough to backdown in the mail service, and drains energy from opponents on physical contact | Interior Defense | 72 | 89 | 96 | 99 | 6'5 | vii'3 |
| Strength | 65 | 76 | 86 | 94 | ||||
| Challenger * | Improves the effectiveness of well-timed contests against perimeter shooters | Perimeter Defense | 69 | 79 | 86 | 95 | ||
| Chase Downwards Creative person | Boosts the speed and leaping ability of a player when he is chasing down an offensive player in anticipation of a block endeavor | Block | 47 | 59 | 75 | 88 | ||
| Clamps | Defenders have admission to quicker cut off moves and are more successful when bumping or hip riding the brawl handler | Perimeter Defense | lxx | 86 | 92 | 97 | 5'7" | vi'9" |
| Glove * | Increases the ability to successfully steal from ball-handlers | Steal | 64 | 85 | 95 | 99 | ||
| Interceptor | The frequency of successfully tipped or intercepted passes greatly increases | Steal | 58 | 78 | 90 | 99 | ||
| Menace | While guarding and staying in front of an opponent, their attributes will drop if good defence is beingness played | Perimeter Defence | 55 | 68 | 77 | 87 | 5'7" | 6'ten" |
| Off-Ball Pest | Makes players more difficult to go past when playing off-brawl, every bit the can grab and hold their matchup and don't go their ankles broken as often | Perimeter Defense | 35 | 45 | 55 | 65 | ||
| Pick Dodger | Improves a histrion'south power to navigate through and around screens while on defense. At the Hall of Fame level, can blow through screens in the park or blacktop | Perimeter Defense force | 64 | 76 | 85 | 94 | ||
| Pogo Stick | Allows players to quickly go back up for another jump upon landing. This could be after a rebound, block effort, or fifty-fifty jumpshot | Block | 67 | 83 | 92 | 98 | ||
| Offensive Rebound | 69 | 84 | 92 | 99 | ||||
| Defensive Rebound | 69 | 84 | 84 | 99 | ||||
| Post Lockdown | Strengthens a player's ability to effectively defend moves in the post, with an increased take chances at stripping the opponent | Interior Defence force | 68 | 80 | 88 | 93 | ||
| Rebound Chaser | Improves a histrion's ability to track downwards rebounds from farther distances than normal | Offensive Rebound | 70 | 85 | 93 | 99 | ||
| Defensive Rebound | 70 | 85 | 93 | 99 | ||||
| Work Horse * | Increases a player's speed and ability to get loose balls over the opponent | Interior Defense | 47 | 55 | 68 | 82 | ||
| Perimeter Defense | 47 | 55 | 76 | 86 |
NBA 2K23 Badge Points & Req. (Last-Gen)
| Bluecoat | Attribute | Min Acme | Max Height | B1 | B2 | B3 | B4 | B5 | S1 | S2 | S3 | S4 | S5 | S6 | G1 | G2 | G3 | G4 | G5 | G6 | G7 | H1 | H2 | H3 | H4 | H5 | H6 | H7 | H8 |
|---|---|---|---|---|---|---|---|---|---|---|---|---|---|---|---|---|---|---|---|---|---|---|---|---|---|---|---|---|---|
| Acrobat | Driving Layup | 5'vii" | 65 | 76 | 76 | 84 | 84 | 84 | 94 | 94 | 94 | ||||||||||||||||||
| Aerial Wizard | Driving Dunk | 50 | 66 | 66 | 81 | 81 | 92 | 92 | |||||||||||||||||||||
| Standing Dunk | 50 | 67 | 67 | 82 | 82 | 93 | 93 | ||||||||||||||||||||||
| Driving Dunk | fifty | 66 | 66 | 81 | 81 | 81 | 92 | 92 | 92 | ||||||||||||||||||||
| Standing Dunk | fifty | 67 | 67 | 82 | 82 | 82 | 93 | 93 | 93 | ||||||||||||||||||||
| Backdown Punisher | Post Control | 55 | 72 | eighty | 87 | ||||||||||||||||||||||||
| Force | 65 | 76 | 86 | 94 | |||||||||||||||||||||||||
| Slap-up | Strength | 6'2" | 7'3" | 74 | 82 | 89 | 95 | ||||||||||||||||||||||
| Dream Shake | Postal service Control | 45 | 62 | 62 | 77 | 77 | 86 | 86 | |||||||||||||||||||||
| Dropstepper | Post Control | 58 | 69 | 69 | 78 | 78 | 87 | 87 | |||||||||||||||||||||
| Fast Twitch | Shut Shot | 67 | 75 | 85 | 96 | ||||||||||||||||||||||||
| Standing Dunk | 70 | 87 | 94 | 99 | |||||||||||||||||||||||||
| Fearless Finisher | Close Shot | 65 | 75 | 75 | 84 | 84 | 93 | 93 | |||||||||||||||||||||
| Driving Layup | 67 | 77 | 77 | 87 | 87 | 96 | 96 | ||||||||||||||||||||||
| Giant Slayer | Close Shot | five'7" | 7'0" | 48 | 57 | 68 | 68 | 77 | 77 | ||||||||||||||||||||
| Driving Layup | 55 | 63 | seventy | seventy | 80 | 80 | |||||||||||||||||||||||
| Limitless Takeoff | Driving Dunk | 65 | 79 | 79 | 86 | 86 | 96 | 96 | |||||||||||||||||||||
| Masher | Close Shot | 63 | 73 | 73 | 82 | 82 | 82 | 96 | 95 | 95 | |||||||||||||||||||
| Mail service Spin Technician | Post Control | 46 | 57 | 57 | 70 | 70 | lxxx | 80 | |||||||||||||||||||||
| Posterizer | Driving Douse | 72 | 85 | 93 | 99 | ||||||||||||||||||||||||
| Pro Touch | Close Shot | 49 | 55 | 55 | 69 | 69 | 69 | fourscore | 80 | fourscore | |||||||||||||||||||
| Driving Layup | 45 | 55 | 55 | 67 | 67 | 67 | 78 | 78 | 78 | ||||||||||||||||||||
| Rise Up | Standing Douse | vi'four" | 7'iii" | 67 | 80 | xc | 98 | ||||||||||||||||||||||
| Slithery | Driving Layup | 69 | 79 | 79 | 89 | 89 | 99 | 99 | |||||||||||||||||||||
| Driving Dunk | lxx | 84 | 84 | 92 | 92 | 98 | 98 | ||||||||||||||||||||||
| Agent 3 | 3 Point Shot | 68 | 83 | 83 | 89 | 89 | 96 | 96 | |||||||||||||||||||||
| Amped | Mid-Range Shot | 59 | 70 | 70 | 78 | 78 | 78 | 85 | 85 | 85 | |||||||||||||||||||
| Iii Point Shot | 70 | 75 | 75 | 82 | 82 | 82 | xc | ninety | xc | ||||||||||||||||||||
| Blinders | Mid-Range Shot | 65 | 77 | 77 | 84 | 84 | 94 | 94 | |||||||||||||||||||||
| Three Bespeak Shot | 70 | eighty | 80 | 89 | 89 | 97 | 97 | ||||||||||||||||||||||
| Take hold of and Shoot | Three Point Shot | 60 | 72 | 72 | 81 | 81 | 93 | 93 | |||||||||||||||||||||
| Claymore | Iii Point Shot | 55 | 69 | 69 | 76 | 76 | 76 | 86 | 86 | 86 | |||||||||||||||||||
| Clutch Shooter | Mid Range Shot | 49 | 59 | 59 | 69 | 69 | 69 | 79 | 79 | 79 | |||||||||||||||||||
| Three Point Shot | 49 | 59 | 59 | 69 | 69 | 69 | 79 | 79 | 79 | ||||||||||||||||||||
| Comeback Kid | Mid Range Shot | xl | fifty | 50 | threescore | threescore | 60 | 70 | 70 | 70 | |||||||||||||||||||
| Three Point Shot | 48 | 58 | 58 | 68 | 68 | 68 | 78 | 78 | 78 | ||||||||||||||||||||
| Corner Specialist | Three Indicate Shot | 60 | 69 | 69 | 79 | 79 | 79 | 89 | 89 | 89 | |||||||||||||||||||
| Deadeye | Three Bespeak Shot | 71 | 82 | 82 | 91 | 91 | 99 | 99 | |||||||||||||||||||||
| Light-green Machine | Mid Range Shot | sixty | 71 | 71 | fourscore | 80 | fourscore | xc | 90 | 90 | |||||||||||||||||||
| Three Bespeak Shot | lx | 73 | 73 | 82 | 82 | 82 | 91 | 91 | 91 | ||||||||||||||||||||
| Guard Up | Mid Range Shot | 55 | 69 | 69 | 77 | 77 | 77 | 86 | 86 | 86 | |||||||||||||||||||
| Three Point Shot | threescore | 73 | 73 | 83 | 83 | 83 | 90 | ninety | ninety | ||||||||||||||||||||
| Limitless Range | Three Point Shot | 74 | 85 | 85 | 92 | 92 | 99 | 99 | |||||||||||||||||||||
| Middy Wizard | Mid Range Shot | 50 | 64 | 64 | 73 | 73 | 73 | 81 | 81 | 81 | |||||||||||||||||||
| Slippery Off Ball | Mid Range Shot | 40 | l | 50 | 60 | lx | 60 | 70 | seventy | 70 | |||||||||||||||||||
| Three Point Shot | 40 | l | 50 | 60 | sixty | 60 | seventy | 70 | seventy | ||||||||||||||||||||
| Infinite Creator | Mid Range Shot | 52 | 64 | 64 | 73 | 73 | 73 | 80 | 80 | 80 | |||||||||||||||||||
| Three Betoken Shot | 53 | 65 | 65 | 74 | 74 | 74 | 83 | 83 | 83 | ||||||||||||||||||||
| Book Shooter | Mid Range Shot | 45 | 59 | 59 | 68 | 68 | 68 | 78 | 78 | 78 | |||||||||||||||||||
| Three Point Shot | 50 | 64 | 64 | 73 | 73 | 73 | 80 | fourscore | 80 | ||||||||||||||||||||
| Talocrural joint Billow | Brawl Handle | 5'7" | vi'9" | 55 | 65 | 65 | 71 | 71 | 71 | 81 | 81 | 81 | |||||||||||||||||
| Bond Out | Laissez passer Accuracy | 65 | 78 | 78 | 85 | 85 | 85 | 94 | 94 | 94 | |||||||||||||||||||
| Break Starter | Laissez passer Accuracy | 55 | 65 | 65 | 76 | 76 | 76 | 86 | 86 | 86 | |||||||||||||||||||
| Clamp Breaker | Ball Handle | 64 | 77 | 77 | 87 | 87 | 96 | 96 | |||||||||||||||||||||
| Dimer | Pass Accuracy | 64 | 69 | 69 | 80 | 80 | 80 | 85 | 85 | 85 | |||||||||||||||||||
| Floor General | Pass Accuracy | 62 | 68 | 69 | 79 | 79 | 79 | 86 | 86 | 86 | |||||||||||||||||||
| Handles For Days | Brawl Handle | 5'7" | 7'0 | lxx | 85 | 85 | 94 | 94 | 99 | 99 | |||||||||||||||||||
| Hyperdrive | Brawl Handle | v'seven" | 6'x | 59 | 69 | 69 | 83 | 83 | 83 | 92 | 92 | 92 | |||||||||||||||||
| Speed With Ball | five'vii" | 6'x | 55 | 67 | 67 | 80 | fourscore | 80 | 90 | 90 | 90 | ||||||||||||||||||
| Killer Combos | Brawl Handle | v'seven" | half-dozen'10 | 65 | 78 | 78 | 88 | 88 | 97 | 97 | |||||||||||||||||||
| Mismatch Skillful | Brawl Handle | 71 | 86 | 86 | 93 | 93 | 98 | 98 | |||||||||||||||||||||
| Needle Threader | Pass Accuracy | 65 | seventy | lxx | 86 | 86 | 86 | 92 | 92 | 92 | |||||||||||||||||||
| Post Playmaker | Pass Accuracy | 45 | 59 | 59 | 73 | 73 | 73 | 83 | 83 | 83 | |||||||||||||||||||
| Quick Beginning Pace | Post Control | lxxx | 87 | 94 | 99 | ||||||||||||||||||||||||
| Ball Handle | 70 | 77 | 85 | 89 | |||||||||||||||||||||||||
| Speed With Ball | 66 | 76 | 84 | 88 | |||||||||||||||||||||||||
| Special Commitment | Laissez passer Accuracy | 47 | 57 | 57 | 67 | 67 | 67 | 77 | 77 | 77 | |||||||||||||||||||
| Unpluckable | Postal service Control | 65 | 75 | 84 | 95 | ||||||||||||||||||||||||
| Ball Handle | 65 | 75 | 84 | 95 | |||||||||||||||||||||||||
| Vice Grip | Post Control | 45 | 57 | 77 | 91 | ||||||||||||||||||||||||
| brawl Handle | 50 | threescore | 75 | 90 | |||||||||||||||||||||||||
| Anchor | Block | half-dozen'4" | 7'3" | 70 | 87 | 93 | 99 | ||||||||||||||||||||||
| Talocrural joint Braces | Perimeter Defense | 5'7" | half dozen'11" | 55 | 67 | 67 | 76 | 76 | 76 | 86 | 86 | 86 | |||||||||||||||||
| Boxout Beast | Offensive Rebound | 48 | 67 | 82 | 94 | ||||||||||||||||||||||||
| Defensive Rebound | 48 | 67 | 82 | 94 | |||||||||||||||||||||||||
| Force | 60 | lxx | 83 | 91 | |||||||||||||||||||||||||
| Brick Wall | Interior Defense | vi'v | 7'iii | 72 | 89 | 96 | 99 | ||||||||||||||||||||||
| Strength | 6'five | 7'3 | 65 | 76 | 86 | 94 | |||||||||||||||||||||||
| Challenger | Perimeter Defense | 69 | 79 | 79 | 86 | 86 | 95 | 95 | |||||||||||||||||||||
| Chase Downwardly Artist | Block | 47 | 59 | 75 | 88 | ||||||||||||||||||||||||
| Clamps | Perimeter Defense | 5'7" | six'9" | 70 | 86 | 86 | 92 | 92 | 97 | 97 | |||||||||||||||||||
| Glove | Steal | 64 | 85 | 85 | 95 | 95 | 99 | 99 | |||||||||||||||||||||
| Interceptor | Steal | 58 | 78 | 78 | ninety | 90 | 99 | 99 | |||||||||||||||||||||
| Menace | Perimeter Defence | 5'7" | 6'x" | 55 | 68 | 68 | 77 | 77 | 77 | 87 | 87 | 87 | |||||||||||||||||
| Off-Brawl Pest | Perimeter Defense | 35 | 45 | 45 | 55 | 55 | 55 | 65 | 65 | 65 | |||||||||||||||||||
| Choice Dodger | Perimeter Defence force | 64 | 76 | 76 | 85 | 85 | 85 | 94 | 94 | 94 | |||||||||||||||||||
| Pogo Stick | Block | 67 | 83 | 92 | 98 | ||||||||||||||||||||||||
| Offensive Rebound | 69 | 84 | 92 | 99 | |||||||||||||||||||||||||
| Defensive Rebound | 69 | 84 | 92 | 99 | |||||||||||||||||||||||||
| Post Lockdown | Interior Defense | 68 | lxxx | 88 | 93 | ||||||||||||||||||||||||
| Rebound Attorney | Offensive Rebound | 70 | 85 | 93 | 99 | ||||||||||||||||||||||||
| Defensive Rebound | 70 | 85 | 93 | 99 | |||||||||||||||||||||||||
| Work Horse | Interior Defense | 47 | 55 | 55 | 68 | 68 | 68 | 82 | 82 | 82 | |||||||||||||||||||
| perimeter Defense force | 47 | 55 | 55 | 76 | 76 | 76 | 86 | 86 | 86 |
*New Bluecoat
- How to Unlock the Gym Rat Bluecoat in NBA 2K23
NBA 2K23 Takeover Guide
Takeovers are special abilities you tin equip on your MyPLAYER that you tin can activate afterwards building upward your Takeover meters. Basically, similar getting hot in existent life. While the chief and secondary Takeovers remain the same, Squad Takeover has been redesigned.
In the terminal couple of versions, a histrion would activate Team Takeover for the entire squad and brand everybody hot after filling upward the principal, secondary, and and then Team Takeover meters in sequential order. For NBA 2K23, Team Takeover works every bit a cooperative team organisation with the entire squad sharing a single meter. Each histrion on the team has an equal portion that they're responsible for filling up by performing well on the court and being practiced teammates. Once each player has filled upwardly their portion of the meter, Team Takeover automatically fires off for the entire team. The new design makes a lot more sense and does a better job representing what it means to be hot equally a team and to accept over the game as a unit.
List of Takeovers
FINISHING
- Advanced Gathers – Unlocks more effective spin, euro, hop step, cradle gathers.
- Easy Blowbys – Enhances the ability for slashers to beat defenders off the dribble.
- Finishing Moves – Able to absorb contact and stop at the rim.
SHOOTING & SHOT CREATING
- Limitless Range – Extends your shooting range out to the logos.
- Pull-Upwardly Precision – Boosts well-timed/aimed shots off the dribble.
- Spot-Upwardly Precision – Boosts well-timed/aimed stationary jump shots.
- Negative Touch on – Reduces defensive touch on confronting pull-ups and other skill shots.
- Anklebreaking Shots – More than anklebreakers off of spin and stepback jumpers.
POST GAME
- Advanced Post Moves – Easier to beat defenders with postal service moves.
- Power Backdowns – Easier to push defenders around when posting up.
- Post Playmaking – Boost your teammates' offensive abilities when passing out of the postal service.
- Post Shot Daggers – Increased scoring ability with hooks, fades, shimmy shots, etc.
PASSING
- Glass Immigration Dimes – After rebounds, boot-out passes boost your teammate'due south shooting.
Defense
- Extreme Clamps – More stone wall and lost distill body-up resolutions for locks.
- Enhanced Jump Shot Contests – Boosts your ability to contest jumpers.
- Interior Badge Driblet – Drops opposition's scoring badges downwardly a tier in the paint.
- Perimeter Bluecoat Drop – Knocks shooting badges down a tier when you get shut.
- Paint Intimidation – Boosts your ability to affect shots around the rim.
- Stuff Blocks – Unlocks more swat, backboard pins, and catch blocks.
REBOUNDING
- Boxout Wall – Improves power to seal off opponents for easy boards.
- See the Time to come – Shows where missed shots are going to end upwards.
OTHER
- Mamba Mentality – You lot are able to change your Takeover abilities prior to whatsoever game.
TEAM TAKEOVERS
- Team Ratings Heave – Playmakers boost their teammates' offensive ratings.
- Team Takeover Heave – Heave your teammates' takeover meter progress.
- Team Badge Boost – Boosts your teammates' badges upward a tier.
Takeover Perks List & How to Earn Them
DECELERATOR – Slows down how chop-chop your opponents achieve Takeover if y'all are guarding them closely.
- Complete Mamba Mentality to earn this perk
MINIMIZER – Opponent'due south activated Takeovers don't concluding equally long when closely guarded.
- Complete Mamba Mentality to earn this perk
SUPPRESSOR –Opponents with an agile Takeover receive smaller attribute boosts when you lot are guarding them.
- Consummate Jackson Ellis Challenge Y to earn this perk
SABOTEUR – When a guarded opponent commits a turnover or bad shot, their Takeover meter gets a larger penalty.
- Complete Jackson Ellis Challenge 10 to earn this perk
SECOND CHANCE – When Takeover is full but not still activated, making a mistake won't completely reset the meter.
- Complete Mamba Mentality to earn this perk
SPONGE – When a teammate performs an action to increase their Takeover meter, y'all go a small-scale boost to your own.
- Consummate LozoTheCrown Challenge X to earn this perk
EXTENDER – Extends the length of time that Takeover stays active.
- Complete Ricky Stat Challenge Ten to earn this perk
JUICE – Gives an extra boost to your attributes when Takeover is activated.
- Consummate Jackson Ellis Challenge Z to earn this perk
STAY WARM – Takeover meters won't drain as quickly when performing poorly.
- LozoTheCrown Challenge Y to earn this perk
ACCELERATOR – Takeover meters make full faster when performing well on the court, allowing you to get Takeover quicker.
- Consummate Ricky Stat Challenge Y to earn this perk
Source: https://nba2kw.com/nba-2k23-all-in-one-complete-badges-takeover-guide/
0 Response to "How To Activate Team Takeover 2k23"
Post a Comment